
Photoshop Vignettes 2
Method 3 – Using a Mask, Selection and a Gaussian Blur
| This base image or background has to be turned into a layer. Do to this double click on "background" in the layers menu (bottom right of the screen) or by clicking on Layer > New > Layer from Background | 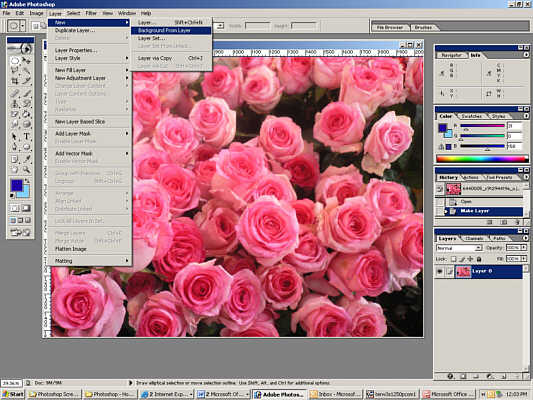 |
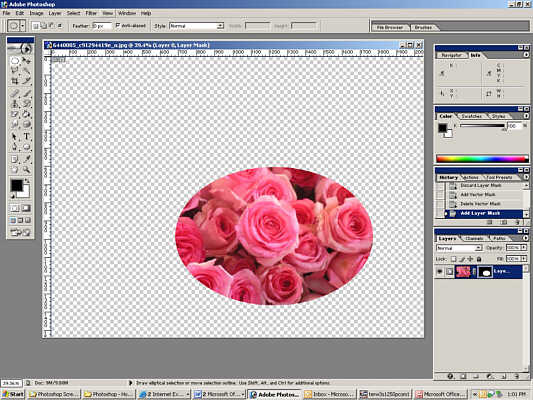
| Use the Elliptical Marquee tool to draw a marquee around the part of the image you want to keep | 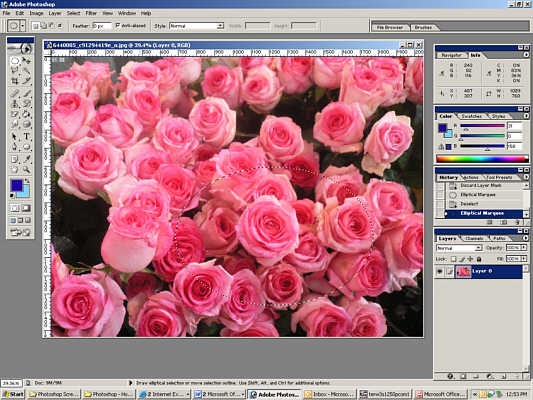 |
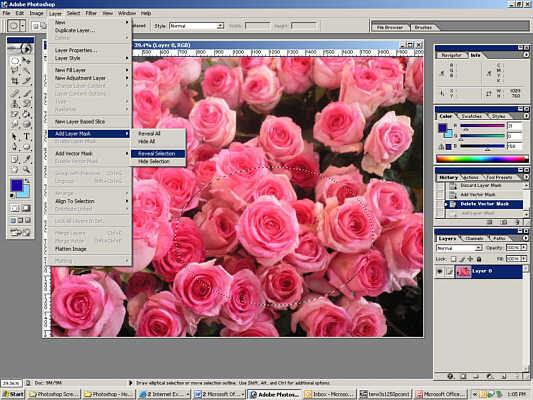
| Click on the "Add Layer Mask" icon (an ellipse inside a circle) on the bottom of the layers menu (bottom right of the screen) or click on Layer > Add Layer Mask > Reveal Selection |
|
| Make sure the mask is highlighted not the image in the layers menu – the colour palette will change to simply black and white.- and click on Filter > Blur > Gaussian Blur… | 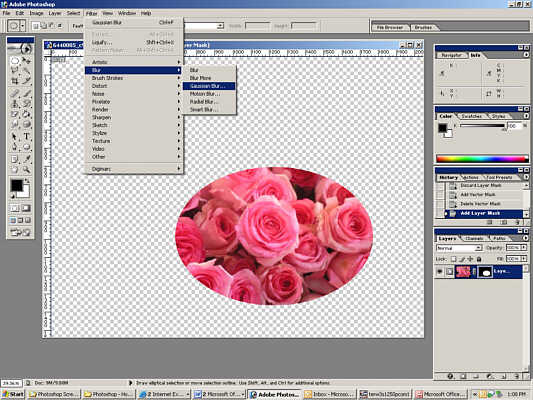 |
| Adjust the Radius slider until the required amount of diffusion is reached. | 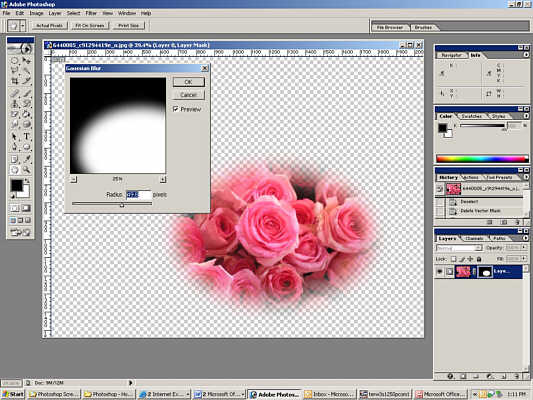 |
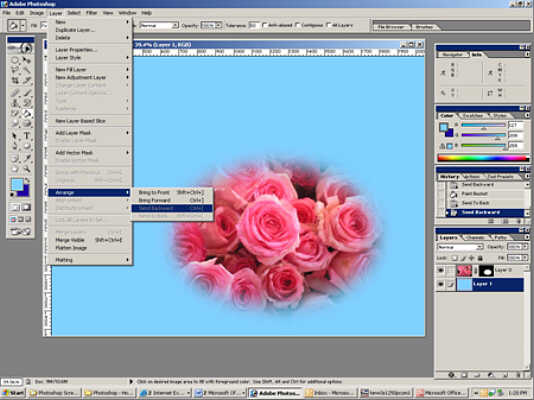
| Create a new layer by either clicking on the "Create a new layer" icon (square within a square) on the bottom of the layers menu (bottom right of the
screen) or click on Layer > New > Layer… You can now either send this layer behind the image and fill it or fill it and then send it behind the image. Use Layer > Arrange > Send Backward to arrange the layers. |
 |
Method 4 - Using a Feathered Selection
| Create a new layer by either clicking on the "Create a new layer"
icon (square within a square) on the bottom of the layers menu (bottom
right of the screen) or click on Layer > New > Layer… Making sure that the new layer is selected; use the Elliptical Marquee tool to draw a marquee around the part of the image you want to keep. |
 |
| From the Select > Feather menu or using Alt + Ctrl + D, choose the number of pixels to feather the selection by. | 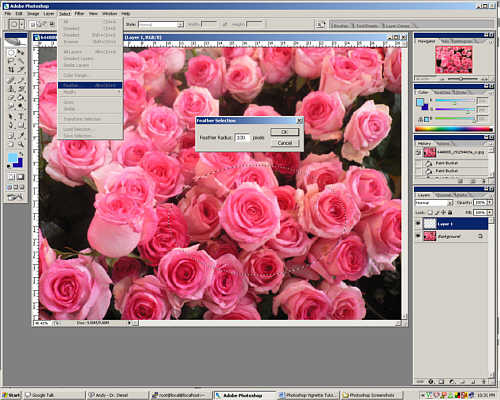 |
| Use Select > Inverse or use Shift + Ctrl + I to invert the selection then use the Paint Bucket Tool to fill the layer… | 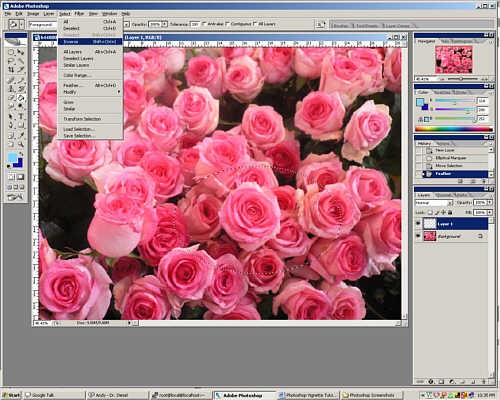 |
| Use the Paint Bucket Tool to fill the layer… | 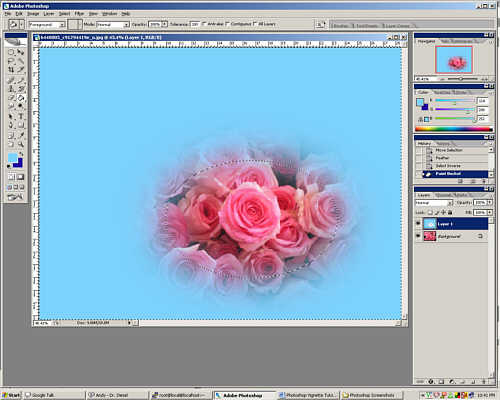 |
This page created 20th April 2007, last modified 21st April 2007
