
I'm particularly pleased with the new front page and page image titles for this site. These pages attempt to show how the vignettes and graduated fills were produced using Picture Publisher 8 from Micrografx.
Graduated Colour Fills 1
1) Create a new image
I created a new image, RBG, 100dpi, 600 pixels wide by 100 high, white background.
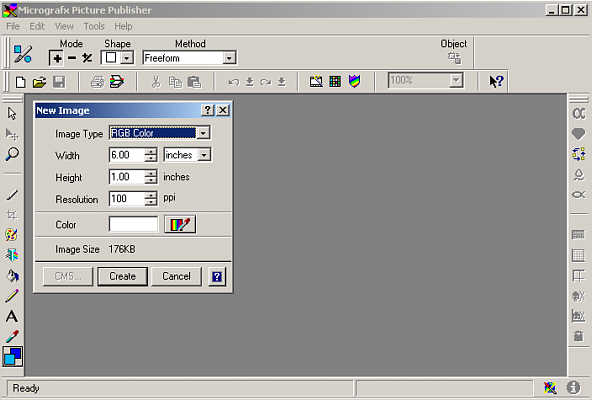
Creating a new image
2) Creating the text
Using BrushScript MT, bolded, and at initially at around 90pt. I added the text in black. Ensure that anti-aliasing is turned off. This is the small icon next to that for underlined text in the toolbar.

Creating the text
3) Positioning and sizing the text
By swapping between the selection pointer and text tools in the Tools menu the text can be resized and positioned centrally in the new image. Once this has been done the text object needs to be combined with the image base. This is done by using the Object > Combine > All Objects With Base menu or by pressing Ctrl + Shift + F
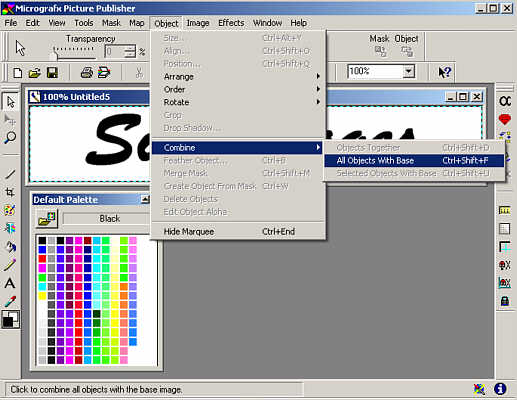
Combining the objects
4) Creating the outline
Using the Effects > Effects Browser... menu or Ctrl + E, scroll down to the Distortion menu and click on Edge Detection. Choose Normal Edge from the menu that appears.
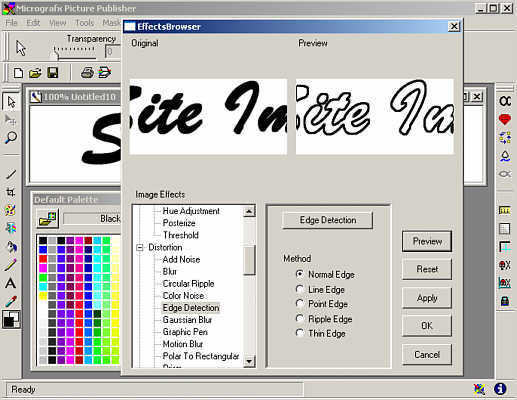
Creating the text outline
This page created 19th June 2005, last modified 3rd July 2005
