Introduction
I've been digitizing audio and video tapes, in an amateur way, for several years. Two recent conversations with friends showed me that they did not know how quickly and cheaply it can be done and so this page was written. This is not an audiophiles guide, so there is not much said about the different types of cable, balanced and unbalanced audio, signal to noise ratios, attenuation, shielding, and so on.
I am not an audiophile, and so long as what I get is listenable or watchable then I'm happy with the result. Signal quality depends on the quality of the cables being used, the length of the cable run, and how many connectors/adpaters are used. As these technniques use short cables with few connections the results are usually acceptable no matter what is used.
I use Windows 10, so the operating sytem specific screenshots are of that.
Audio Cassettes
Audio cassettes can be digitised very easily and probably doesn't require any extra equipment than you've already got. All you need is some sort of player which must have at least some way of connecting the audio signal out of it - even a headphone socket will do. An ordinary computer audio cable, and some software to record the audio.
The Player
Almost any player will do, so long as it has some sort of output; line out or headphone socket seem to work best. About the only audio cassette player I have now is a Sony CFD-G500 Boombox that only has a headphone socket, so I'm using that.
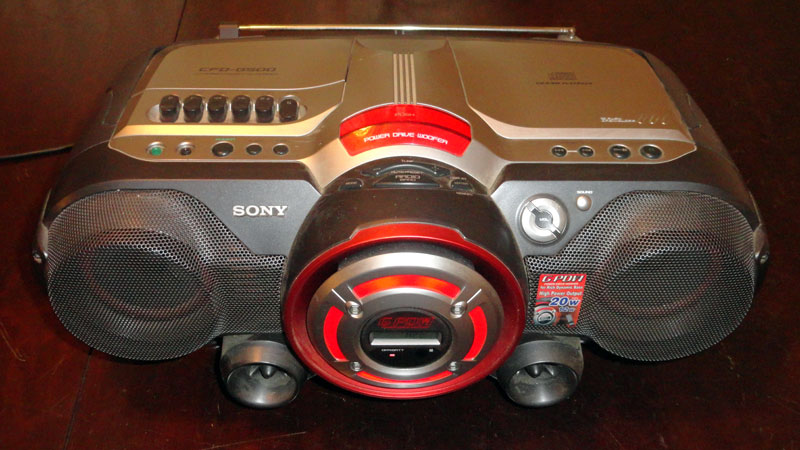
My Sony CFD-G500 Boombox
The Cable
There is one technical bit you do need to know about the cable and that is connectors on the ends of it.
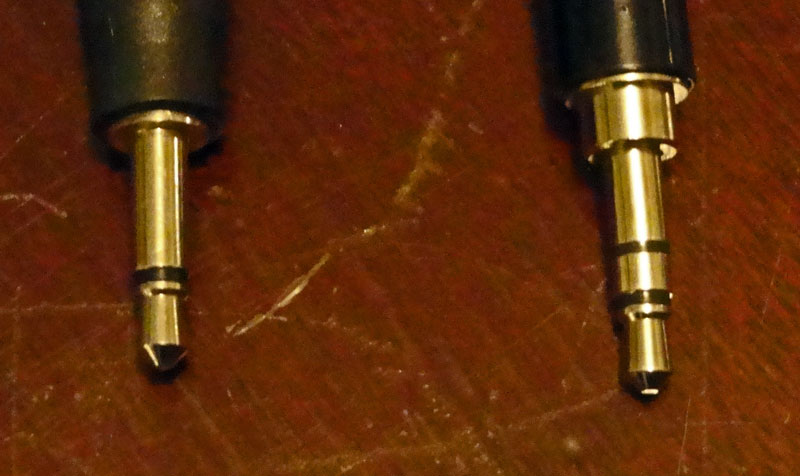
Mono (left) and stereo (right) cables
Take a look at the above image, the black rings are insulators and separate the different conponents of the connector. The cable on the left is a mono cable, it has a tip, the insulator and then the sleeve. It is known as a TS cable. The cable on the right is a stereo cable. It has a tip, insulator, ring, another insulator, and then the sleeve. It is known as a TRS cable. In this cable the tip carries the left audio channel; the ring, the right audio channel and in both types, the sleeve is ground.
If you try and record a stereo signal using a mono (TS) cable then you will only record the left hand audio channel. You do not get a full mono recording because the right audio channel is shorted to ground at the source; whatever recorder you use never gets the right audio signal.
Depending on your laptop, you may have a combo audio socket. These will accept jacks with three insulators, giving two rings, known as TRRS. In these the tip is for the left audio channel, the first ring is the right audio channel, the second ring is the microphone input and the sleeve is the ground. Unfortunately not all manufactuers follow this and some swap the sleeve and microphone contacts. You need to check both what socket and cable you have. Usually these sockets are mono microphone input with stereo audio output only. These sockets will also accept TSR cables but obviously, the microphone will not work. Do not plug a TRRS jack into a TRS socket. For laptops, it will be better to buy one of the USB adapters mentioned above.
It may be your cassette player has RCA phono commposite or some other type of output. There are cables for all of them. Here's a RCA to 3.5mm audio that I lying around. It should be white (left audio) and red (right audio) as yellow is usually for composite video, but this cable is wired correctly and works for audio.
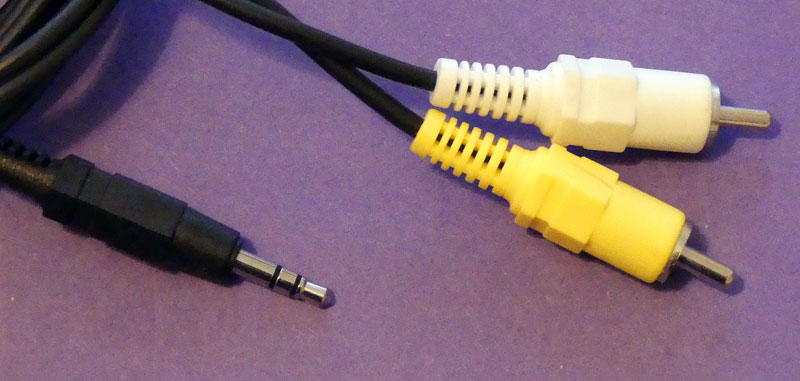
RCA to 3.5mm cable. Yellow is usually for composite video, but this cable works for stereo audio
Connectors and Adapters
Most computer sound cards use 3.5mm minijack connectors, which by a happy conincidence is the same size as a lot of headphone-out sockets on cassette players. You may find you need some sort of adapter, such as 3.5mm to 2.5mm or even from minijack to USB but these are cheap and easily obtainable.
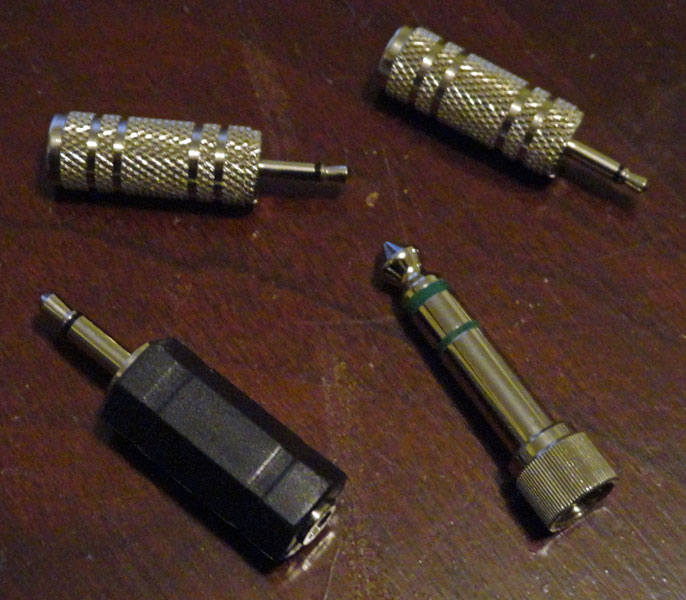
A collection of audio adapters
Many computers, especially laptops, no longer come with line-in sockets so audio to USB adapters such as these from Amazon may be needed.
Inputs and Outputs
I was hoping to put something simple about which connections can be made between the various outputs and inputs of various devices for the best results and without damaging anything but after reading several articles on the subject which talk about dB, dBv, dBm, dBu, ohms, volts, impediance, frequency and all the rest I'm as confused as ever.
Most audio inputs are fairly tolerant of what their input is, but some connections give better results than others and some may damage something.
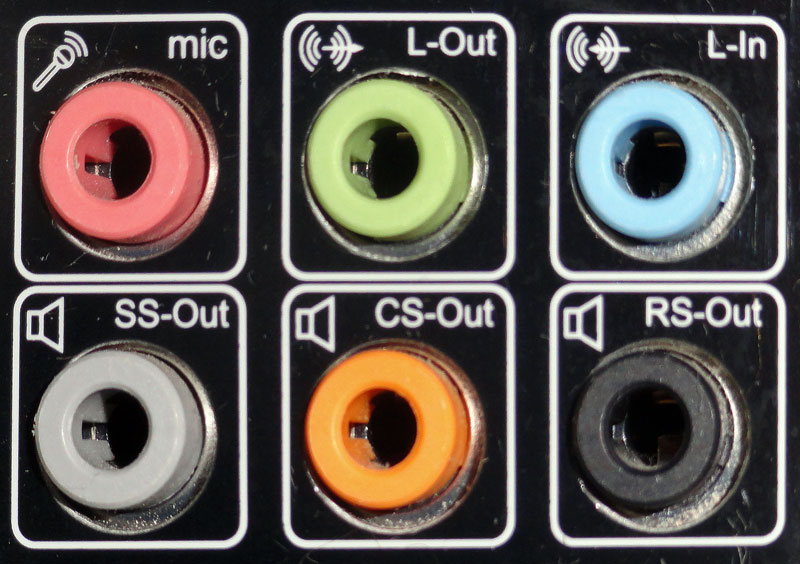
The soundcard I/O ports on my computer
My computer also has digital audio optical and co-ax S/PDIF (Sony/Philips Digital Interface) and HDMI (High-Definition Multimedia Interface) for digial audio and video ports but those aren't used here.
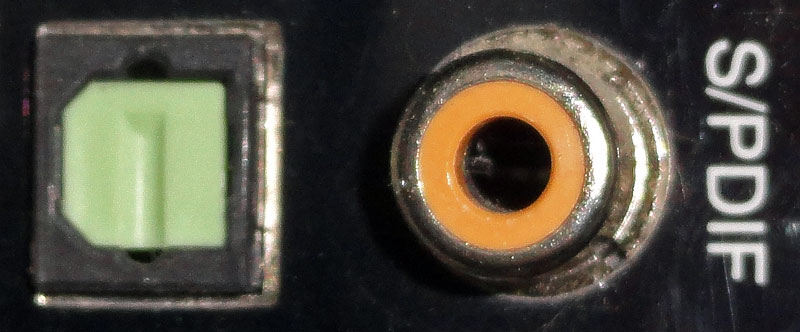
Digital S/PDIF Ports
The audio ports are color-coded and most manufacturers adhere to the PC 2001 specifications developed by Microsoft and Intel. All of these have 3.5mm sockets.
Color |
Function |
| Pink | Microphone input |
| Lime Green | Line output, main stereo output for front speakers and headphones |
| Light Blue | Line input, stereo input |
| Gray | Line output for side surround speakers |
| Orange | Line output for center/middle surround speakers and subwoofers |
| Black | Line output for rear suround speakers |
Some computers will have more or less ports than the ones shown above, but most will have the microphone, line-out and line-in ports.
If your audio cassette player has a line out then use that instead of the headphone socket as you will probably get slightly better audio quality. The output of the headphone socket can be controlled using the audio casstte player's volume control.
Microphones have very low output levels and so the circuitry for the pink microphone input will amplify the signal. Do not connect your cassette player's line-out or headphone socket to this socket. The signal will be amplified again and may be distorted, if you're really unlucky, it may damage the soundcard.
Even if you can, do not connect any powered output meant for speakers (except for the headphone socket) to any of the computer inputs. You will probably damage something.
Connecting to a Computer
Simply plug one end of the audio cable into the headphone socket of the player and the other into the blue line-in socket of the computer. Now the fun begins.
I have a MSI motherboard with RealTek audio so the first thing that happens is that the RealTek/MSI audio manager pops up to confirm that I just plugged something into one of the audio ports.
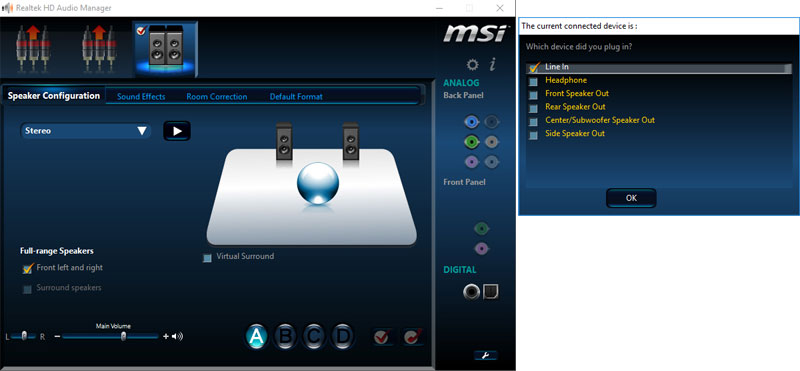
RealTek Audio Manager
The next step is to ensure Windows knows which audio devices are attached. It's a nuisance but it may as well be done now rather than try to figure out why the recording software is not recording anything.
Right click on the sound icon in the right hand notification area of the Taskbar.
Click on "Open Sound settings"
Scroll down, and open "Choose your input device"
Choose "Line In"
Continue to scroll down and click on "Sound control panel"
When that opens, click on the "Recording" tab
Scroll down and ensure "Line In" is selected
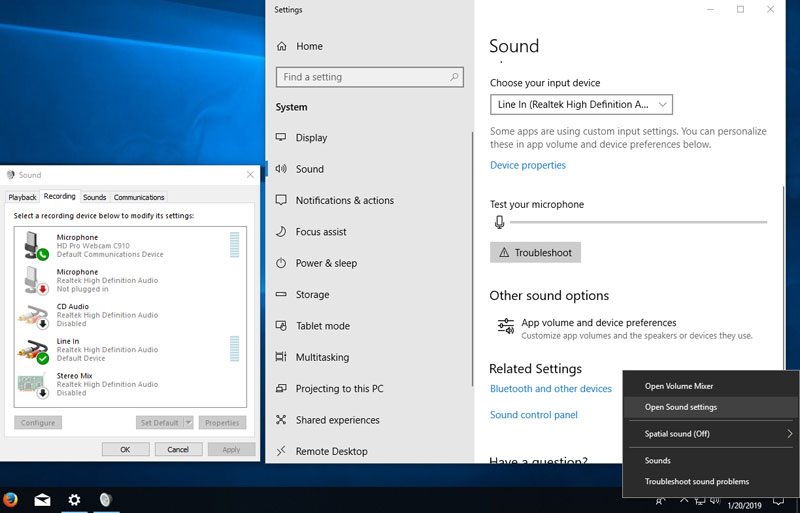
The Windows 10 audio and sound control panels
Recording Software
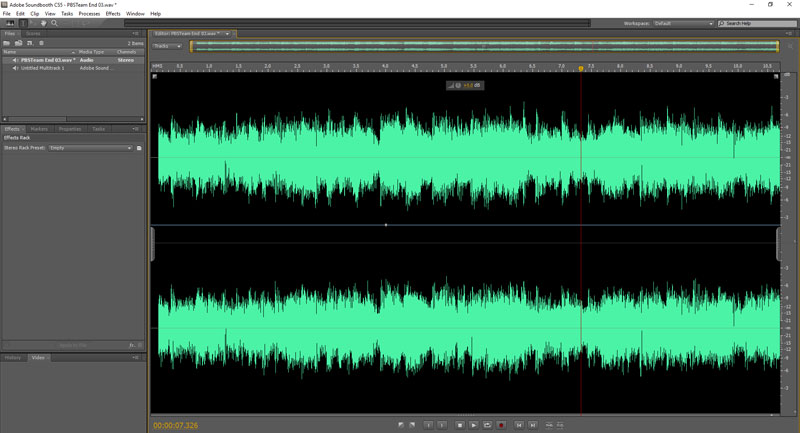
I have two main audio recorders/editors. One is the free Audacity and the other is Adobe Soundbooth which has been superceded by Adobe Audition. I use audition at work but at home I still have an old copy of Soundbooth.
Both pieces of software need to know what interface/device you will be recording from and from which port.

Audacity IO toolbars
Between Audacity and Soundbooth the preferred choices of interface, from best to less good, will be:
WASAPI (Windows Audio Session Application Programming Interface)
WASAPI is the preferred method. It is the newest of the audio framworks being introduced in Windows Vista in 2007. It provides applications with exclusive access to audio devices, bypassing the system mixer, default settings, and any typically any effects provided by the audio driver. All of this means it has low latency which means it can process audio very quickly.
WDM (Windows Driver Model)
This was introduced in Windows 98 in 1998. The problem with WDM was the Kernel Audio Mixer or KMixer. WDM was great in that it did the audio mixing for soundcards, which meant even low-end cards could perform well. It had a major problem though in that it tried to process every audio stream that came through it - even those it did not support. This resulted in long latency times, often around 30ms on less capable machines, which in audio processing, is a very long time.
DirectSound
DirectSound was introduced in Windows 95 in 1995. DirectSound is now dpreciated as it relies on Direct-X but is still around because later versions could provide hardware acceleration and bypass WDM's KMixer. Another reason it is depreciated is that it had a complicated caching scheme that could sometimes cause memory errors.
MME (Multimedia Extensions)
This first appeared in Windows 3 in 1991 and so is the oldest of the frameworks. One of its drawbacks is that it cannot mix multiple audio streams but it's still around as it supports almost everything.
There are drawbacks to a lot of these drivers/frameworks but they are still around because, despite their problems, they work. They've all been improved over time and there shouldn't be much of a problem using any of them.
Audio Levels
As the headphone socket on the cassette player is being used then the volume control can be used to control the audio level. The idea is to use a fairly high volume to overcome any tape noise and hiss but not high enough to introduce clipping. The input can also be controlled in both Audacity and Soundbooth.
Cliiping is where the input signal is so strong it is beyond the hardware and software's capabilities and so the signal becomes distorted. Keep an eye on the graphical imput meters of the software and ensure it does not become red for exended periods. If it does, then the input level is too high and the recording has to be done again.
Output Formats
Both Audacity and Soundbooth can save the audio in a variety of formats both lossless and lossy. Lossless - AIF, FLAC, WAV. Lossy - AAC, MP3, OGG, WMA.
Because of licensing issues Audacity cannot use MP3 and some other formats as soon as it is downloaded, but the addition of LAME (LAME Ain't an Mp3 Encoder), specificaly for mp3 and FFmpeg opens up more capabilities.
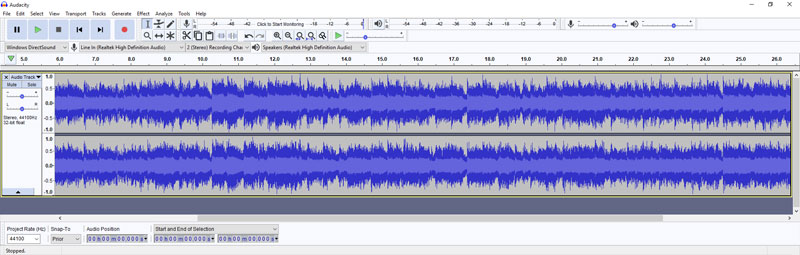
Audacity (above) and Soundbooth (below)
Tagging
Just as images can be have metadata, uslly Exif, but there are other formats, added to them then so to can audio files. My favorite tagger is Mp3tag which can automatically search for tags and even the cover art.
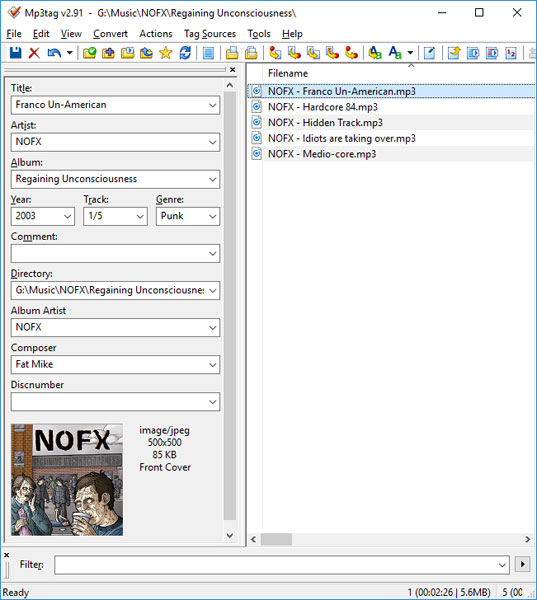
Mp3tag audio tagging utility
Sources and further reading
Digitizing Analog Audio Sources Using Audacity - A nice guide from the Sustainable Heritage Network
This page created 19th January 2019, last modified 20th January 2019