Introduction
I was scanning an image from a book and came across an old problem, the scanned image suffered from very heavy banding that would be difficult, if not imposible, to totally remove using Photoshop. The banding are moire patterns caused by the interaction of how the photographs are printed and how scanners work. This page was created to explain the phenomenon and how to prevent it from happening.

Heavy banding on a scanned image from a book
How images are printed
In Atlas of Analytical Signatures of Photographic Processes Dusan Stulik says that "Most methods of mechanical printing can only print ink or leave blank areas on a printed substrate. The halftone process translates the different tones of a photograph into dots of various
sizes."
Most printers only have a limited number of inks available, just black for black and white work or cyan, yellow, magenta, and black (CYMK) for color. To give the appearance of continuous grey or color tones then the original photograph is processed to produce a halftone screen made up of different sized dots.
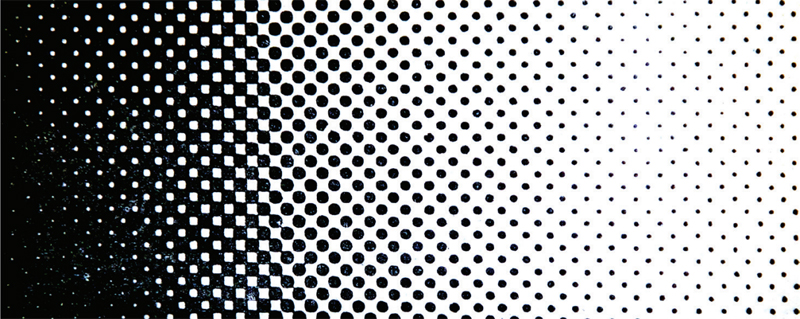
A black and white halftone screen
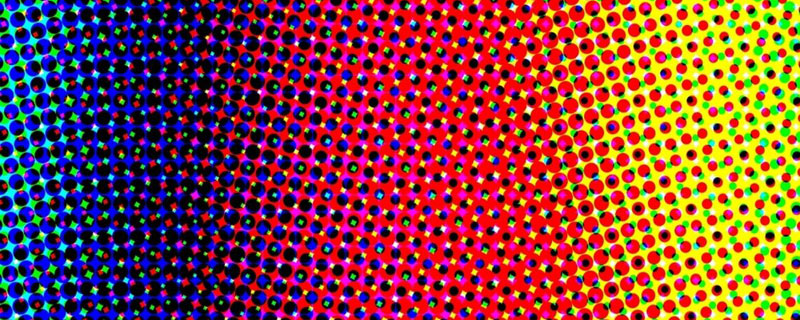
Color (CYMK) halftone screens
To reduce the appearance of moire patterns the CYMK screens are rotated slightly in relation to each other.
As a side-note it's worth mentioning why K is used instead of B for black. The K in CYMK stands for Key. This is the plate that is used to align the other color printing screens. It is also the plate that adds contrast and detail and for that black is used. The black created by mixing the other colored inks is often not a true black and so a true black ink is used.
There are hundreds of types of printing press but the process is basically the same in all of them. During the process of preparing the photograph for printing, a fine screen of intersecting lines is placed between the photograph and the printing plate for offset presses. The process is almost the same for mechanical or digital printing. This screen breaks up the continuous tone of the image into thousands of tiny dots of varying sizes, larger and closer together where the image is dark and smaller and farther apart where the image is light. For color work different screens are used for each color. These colored screens are rotated slightly to prevent moire patterns from appearing.
In offset printing, each plate is inked with a single color of ink. A page with more than one color is created using multiple plates. In offset lithographic printing the plates are wrapped around rotating cylinders. Full color artwork is created by passing the paper across each of the spinning cylinders.
Another side-note, halftoning is a form of dithering but halftoning is a specific process in the printing industry. Dithering is a more general term and mostly applied to computer applications. The desired effect is the same - to fool the eye into seeing more colors or tones than there really are.
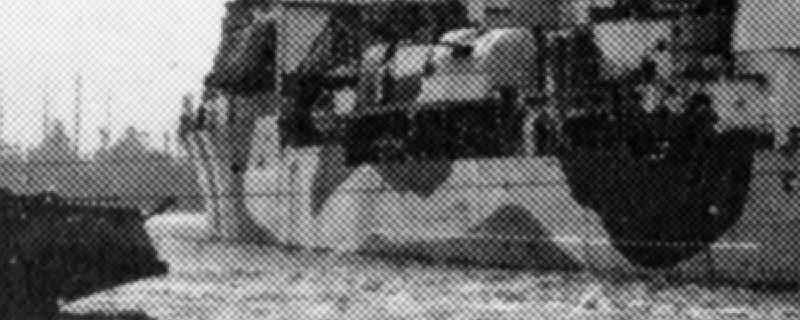
The dot pattern on a scanned image
How scanners work
Just as printers do not use continuous, variable tones or shades, nether do scanners. There are several types of scanner available including, handheld, drum, slide and film using various technologies such as photomultiplier tubes (PMT) and Contact Image Sensors (CIS). This article concentrates on flatbed charge-coupled device (CCD) scanners.
How a scanner works is fairly simple, even though the technology behind them is not. The first scanners were around in the 1950s with the first image scanned by Russell Kirsch at the National Bureau of Standards (now the National Institute of Stands and Technology) using a drum scanner. The first flatbed scanner was created in 1976 at Bell Labs and one of the first users was Ray Kurzweil one the leaders of Optical Character Recognition (OCR) and the inventor of the Kurzweil Reading Machine that could use a scanner and text to speech software to read to the blind. Despite their long history, it wasn't until the late 1990's that flatbed scanners became affordable for most people for home use.
Most flatbed scanners consist of a lid with usually a white inner covering, a glass platen, a stepper motor (a motor capable of small incremental movement instead of continuously rotating), a belt, a light source (usually, light emitting diode (LED), Xenon, or cold cathode fluorescent (CCFL)), a stabilizer bar, a couple of mirrors and lenses, and the charge-coupled device (CCD) itself.
The white cover of the lid is used as reference point for tone and to determine the size of the document. The lamp and scan head which consists of mirrors, filter, lenses and CCD is moved by the stepper motor by means of a belt along the document. Because it has to be precise the head is attached to the stabilizer bar to steady it. The light is reflected off of the document onto a mirror which reflects it onto another. If a color document is being scanned the image is split into three through red, green and blue filters onto the appropriate sections of the CCD array. A CCD is collection of light-sensitive diodes which convert photons (light) into electrons (electrical charge). These diodes are called photosites, and the brighter the light they receive the more electrical charge they produce. The scanner uses these electrical charges to build the image that is sent to the computer.
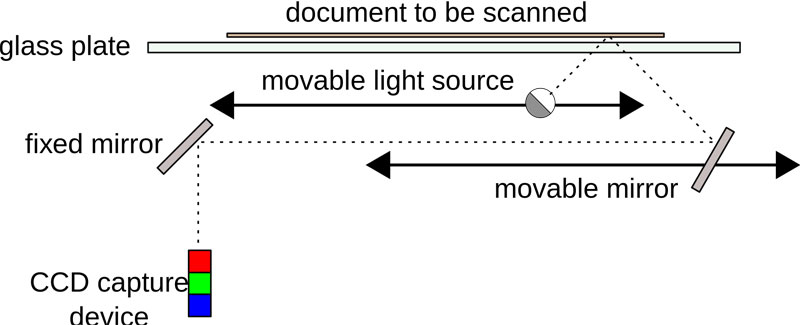
How a flatbed scanner works
Moire Patterns
So, the image being scanned is a series of dots and so are the images produced by the scanner, what could possibly go wrong?
Unfortunately, there is something called moire patterns which are large-scale interference patterns caused when a pattern is overlaid on another, similar pattern. The effect can clearly be seen in the animation below. As one of the patterns is rotated, at certain angles the interference patterns can be seen.
Demonstration of how moire patterns are produced
How to mitigate the effect while scanning
it is far easier to remove these patterns while the document is being scanned that trying to do it afterwards in a photo editor.
There are several ways of doing this:
1) Descreen
Use the descreen option in the scanner software. I use an Epson Artisan 810 all in one printer which was purchased in 2010 but still working well. The software has several options for allowing how much complexity the user needs in controlling the scanned image such "Home", "Office" and "Professional" but all have the option of descreening.
With descreening selected the software greatly reduces the moire pattern on every scan I have tried it with.
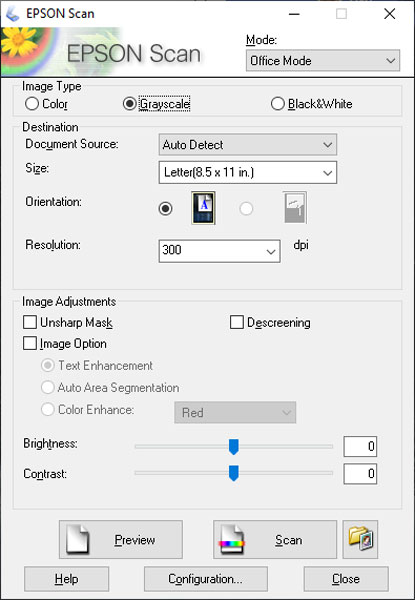
Epson scanner software interface
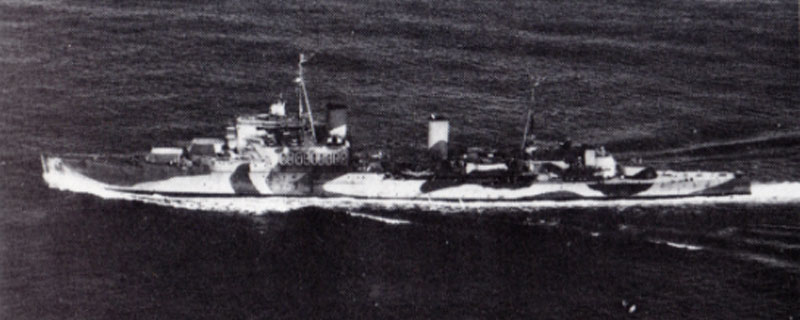
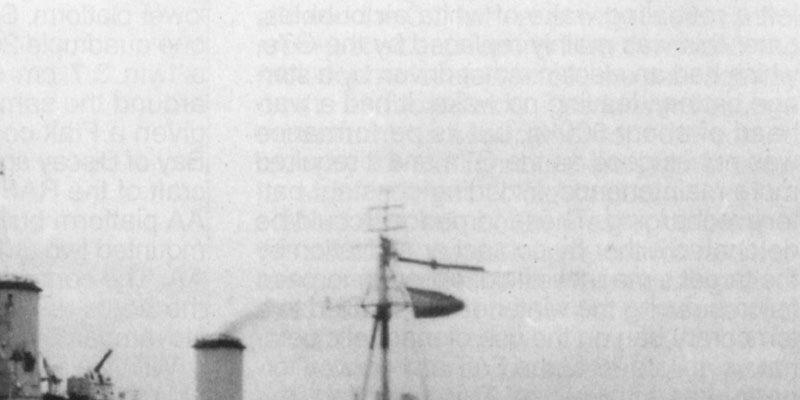
The same image scanned without descreening (above) and with (below)
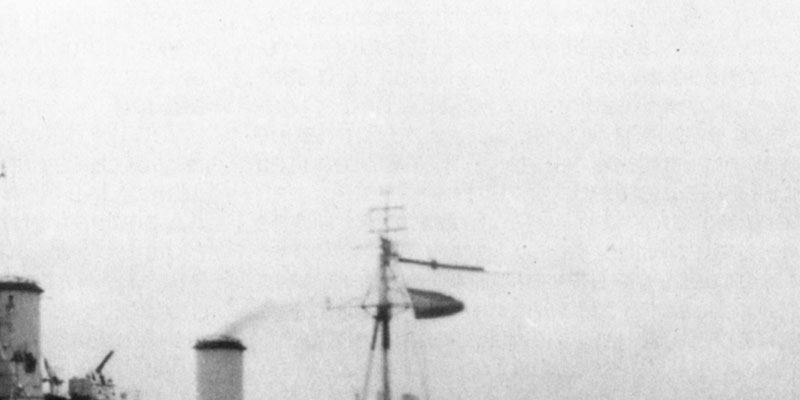
Descreened (above) and sharpened (below)

There is a price to pay for using descreening in that the image is blurred slightly. But, it is far easier to correct the sharpness and contrast in an image editor rather than try and remove the banding of the moire pattern.
2) Oversample, blur and unsharp
A second method is to scan the image at much higher resolution that what the final image will be used at. In the examples below the image was scanned at 1200dpi then reduced in size and dimensions to 72dpi for this page. Doing this removes the moire pattern but may leave the original print halftone screen.

The image scanned at 1200dpi, corrected using blur and unsharp, then resized (below)

In the above example a technique using the Gaussian blur and unsharp filters in Photoshop were used.
a) The scanned image was opened in Photoshop and a duplicate of the layer on top of the original was created.
b) Using the new layer, Filter > Blur > Gaussian Blur was chosen and a value of between 1 and 3 was applied.
c) Next the Unsharp Mask was used from Filter > Sharpen > Unsharp Mask and the following values used: Amount 50-100%, Radius 1-3 pixels, Threshold 1-5
d) The opacity of the top layer was set at zero and then increased until the halftone screen pattern of the original, bottom image stared to show.
e) The image was then reduced in size and saved.
3) Oversample and median blur
A third method is to oversample the image as in method 2), then apply a Filter > Noise > Median filter with a setting of round 10. As before, the opacity of the top layer was set at zero and then increased until the halftone screen pattern of the original, bottom image stared to show. The image was then reduced in size and saved.
The image scanned at 1200dpi then corrected using the median noise filter, then resized (below)

4) Scan at an angle
The final method I know of to try and reduce the moire interference is to scan the image at an angle to the scanner bed. As was seen in the animation above, the pattern is worse at some angles than others. By scanning at an angle at least some, if not all, of the banding can be reduced.

This image was scanned at about 30 degrees to the scanner bed.
There is little evidence of banding and the image can be tidied using any of the techniques above.
Bleedthrough
Bleedthrough or ghost text is where the text or images on the reverse of a scanned page shows through on the scan. It usually happens in books or magazines with thinner paper.
An example of bleedthrough
Solution 1
The first solution is simple, simply put a piece of thick, black paper behind the page being scanned. This provides a uniform background for the page scan.
The image rescanned with a piece of thick, black paper behind the page
Solution 2
Solution 2 is more of a series of solutions, all involving photo editing software, and they work with varying degrees of success. For example, in Photoshop, the Curves or Levels tool from the Image > Adjustments menu can be used.
Some scanner software has a "Reduce Bleedthrough" option which will try and reduce the bleedthrough automatically.
Sources and further reading
Atlas of Analytical Signatures of Photographic Processes - explains the halftone printing process by Dusan C. Stulik
How Scanners Work
Sattva Descreen plug-in for Adobe Photoshop - A commercial plug-in descreening plug-in for Photoshop. I have not used this but I think even this may have problems with serious moire patterns.
Scanning Tips - Wayne Fulton's great site about scanners and photography
The Making of Picture Book Illustrations: What is Preseparated Art? - How art is prepared for printing
What is a line screen? - A discussion of SPI, PPI, DPI, and LPI for various devices and how they relate to each other
This page created January 13, 2019; last modified August 9, 2020
